Dads are more than just a parent. They are your kids best friend and support system! Gift dad a heartfelt gift this Father’s Day by helping your children prepare homemade cards.
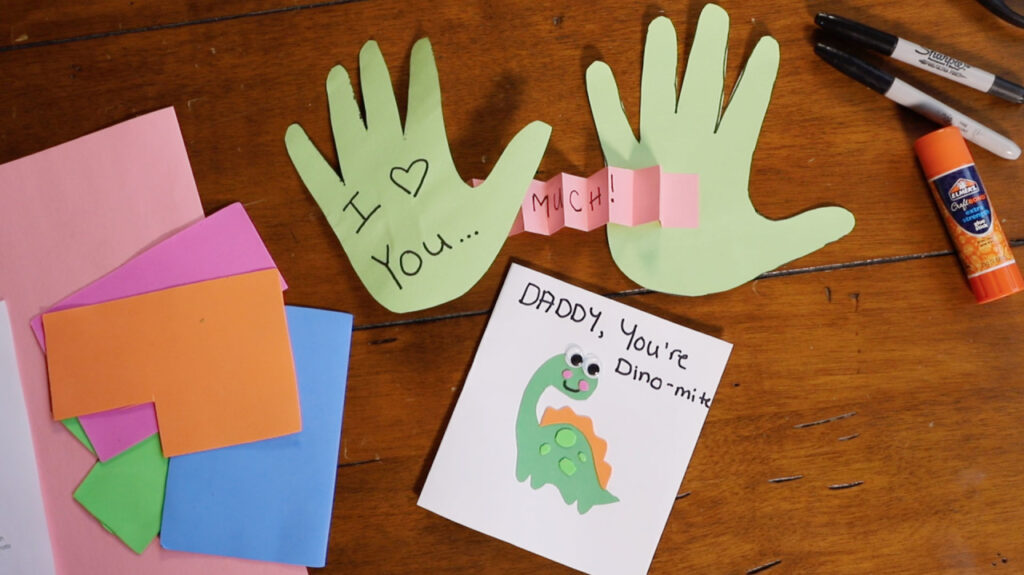
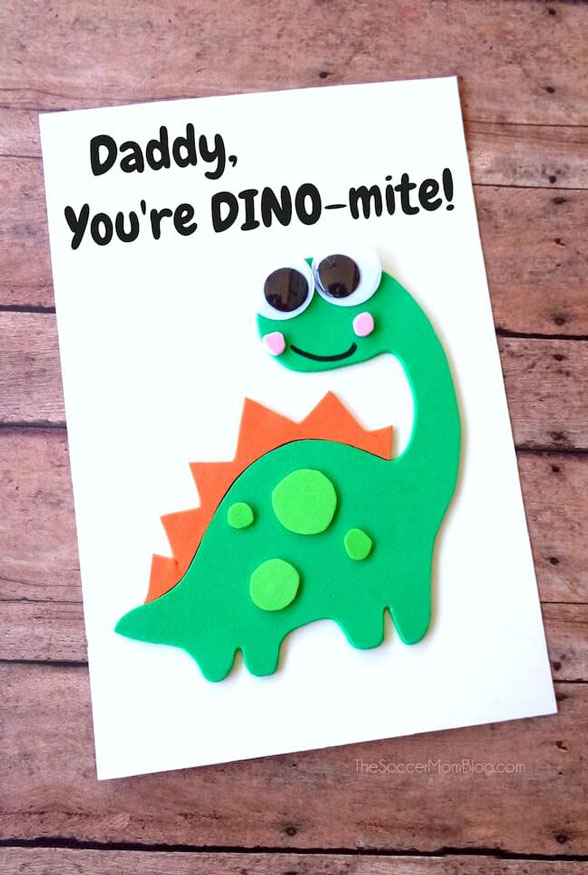
“Dino-Mite”
Simple and adorable, these “dino-mite” cards are punny and perfect for last-minute card ideas. You will need the free printable dinosaur template, craft foam sheets (light and dark green, orange, and pink), a sheet of white cardstock, scissors, glue, googly eyes, and a black marker or pencil.
- Print the dinosaur template and cut out the pattern into two pieces: body and spikes.
- Trace the body onto the dark green craft foam and then cut it out.
- Then, trace the spikes onto the orange craft foam and cut that out.
- Glue the spikes and the dinosaur onto the white cardstock so that the spikes are along the back of the dinosaur.
- Using the light green craft foam, cut a few various sized circles and glue them onto the body of the dinosaur.
- With the pink craft foam, cut small rosy cheeks and glue them in place on the face.
- Glue the googly eyes on the face.
- Draw a smile with the black marker.
- Add a message at the top of the card – “Daddy, You’re the DINO-mite!” or add a personal touch. Get creative and draw a landscape in the background or add a family photo/child’s photo on the inside of the card.
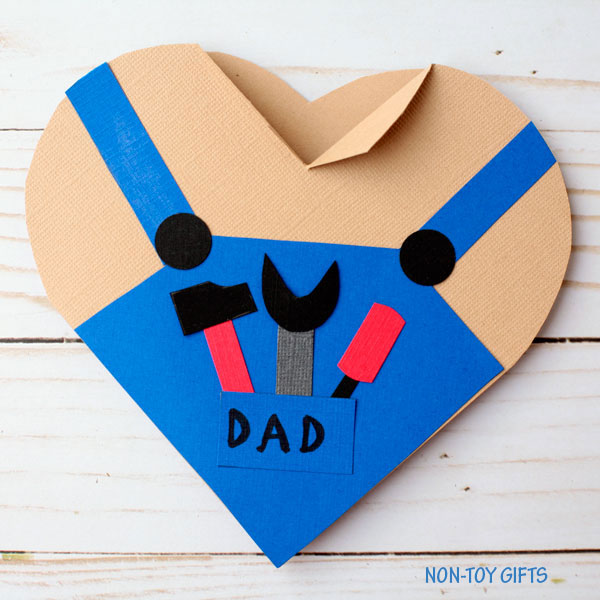
Handy Dandy Heart
Do your kids love helping dad in the shop or around the house? This sweet card is fun to make and can easily be created for grandparents too. You will need to purchase the template to download (or freehand the patterns), beige cardstock, blue, black, red, and gray construction paper, scissors, glue, a black marker, and a circle punch.
- Download, print and cut out all patterns from the template.
- Fold the beige cardstock in half and trace/cut out the heart. Make sure you align the left side of the heart to the fold.
- Make a one-inch cut in the middle of the front side of the heart and fold the sides to the outside. This creates the illusion of a collared shirt.
- Trace the overall, straps, and pocket pattern on the blue paper. Cut and glue the overalls and straps onto the heart.
- Use the circle punch to make two buttons from the black paper, and then glue the buttons at the end of each strap connecting to the overalls.
- Trace the tools on gray paper and cut them out. You can also use black and red paper to highlight some of the details on the tools.
- Glue the tools to one side of the pocket, and then glue the pocket to the middle of the overalls.
- Use the black marker to write DAD or GRANDPA in the middle of the pocket and to write a sentimental message inside the card.
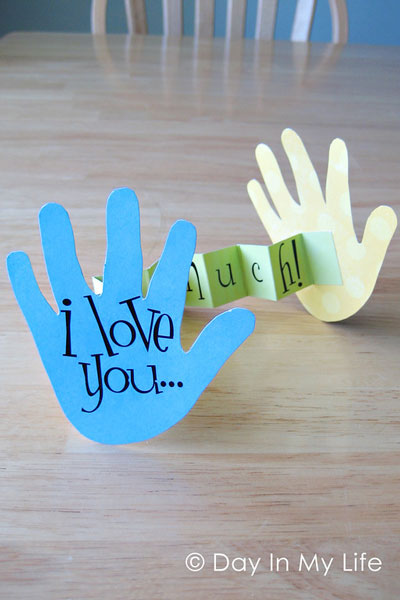
“I Love You THIS MUCH!”
Doubling as the perfect keepsake to remind you of how little your kids once were, this card is super easy and only takes three steps. You will need colored paper, and a pen or pencil.
- Trace your child’s hand and then cut two copies.
- Cut out a strip of paper and fold it accordion style. Use stickers or a pen/pencil to write out “I love you…” on the outside, and “this much” on the accordion folded strip.
- Glue the ends of the accordion strip on the insides of the hands, and voila – the card is finished.
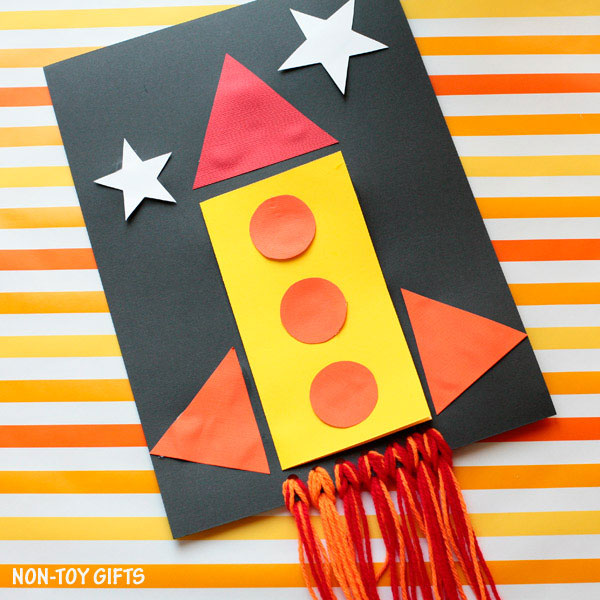
To the Moon and Back
Show dad how much you love him with this DIY card that will melt his heart. Other than the free rocket template, you will need cardstock paper (black, white, red, yellow, and orange), orange and red yarn, scissors, glue, a black marker, and a hole punch.
- Fold the yellow paper in half and cut it into a smaller rectangle; this will be the body of the rocket. You will also write your personalized message on the inside of this paper.
- Cut two small triangles and three circles out of the orange paper. For better direction on sizes, download and print out this template.
- Cut one triangle slightly larger than the other two with the red paper.
- Cut star shapes out of the white paper.
- Glue the rocket on the black paper, left aligned in the center.
- The red triangle should be glued on top of the rocket, and two orange triangles go on each side of the bottom of the rocket.
- The three orange circles are glued onto the rocket as windows.
- The stars should be glued on either side at the top of the rocket.
- Use the hole punch to make a few holes at the bottom of the rocket.
- Thread orange and red yarn through these holes, tying them up and cutting them the same length.
- Use the black marker to write a personalized message on the inside of the rocket.
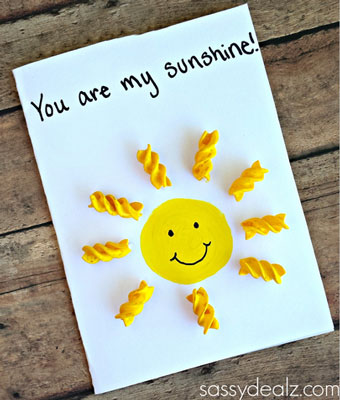
“You Are my Sunshine”
Perfect for any parent or grandparent, this cute card is easy for all ages using just yellow paint, white cardstock paper, a black marker, and some curly noodles!
- Squirt some yellow paint onto a plate and roll each noodle in the paint. Using a paintbrush in this step helps keep the activity mess free!
- After the noodles dry, paint a yellow circle on the (folded) white cardstock.
- Then, glue all the noodles around the outside of the circle to make the rays of sunshine.
- Finally personalize the card with a message, photo, or drawing on the inside and write “You are my sunshine!” on the front of the card.